HelpDesk installation
Ready to get started with HelpDesk? You can either watch our video tutorial or follow the instructions below.
Download installer
Download the latest setup file by navigating to our download page and entering your email address.
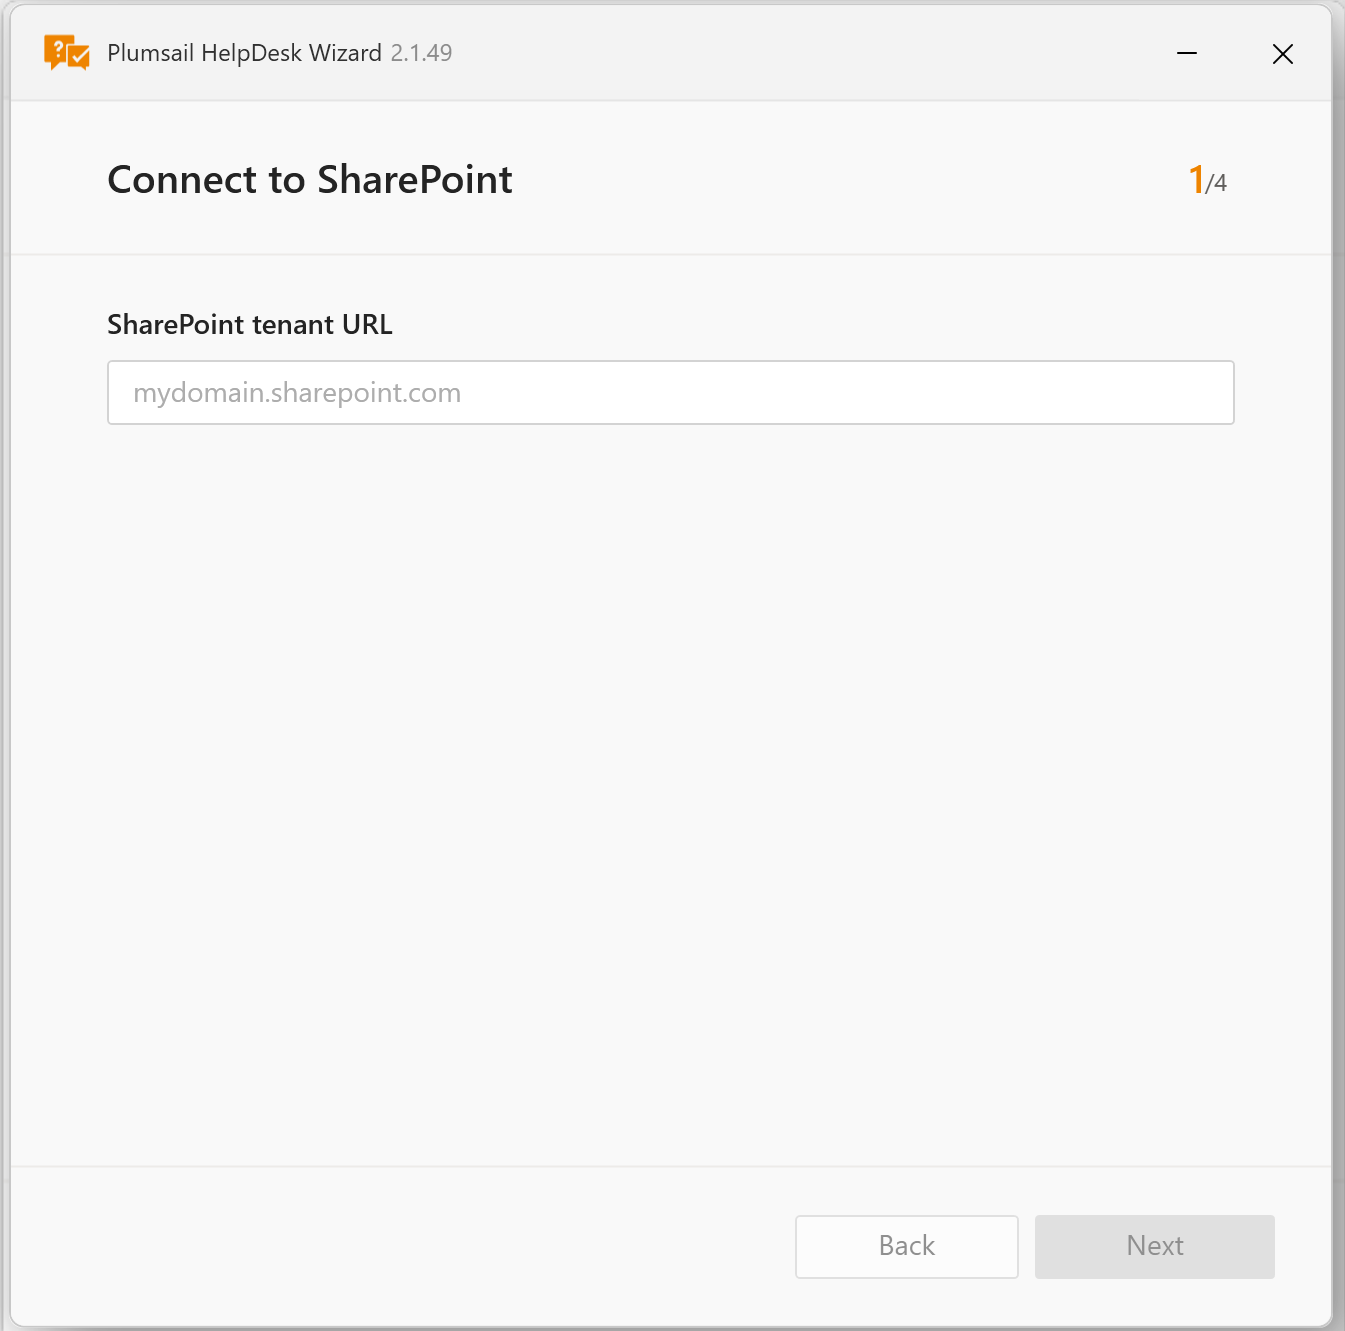
Run the installer and enter your SharePoint tenant when prompted:
Next, enter your credentials.
Note
Use SharePoint admin credentials to prevent any access issues during installation. Learn more about full control permissions.
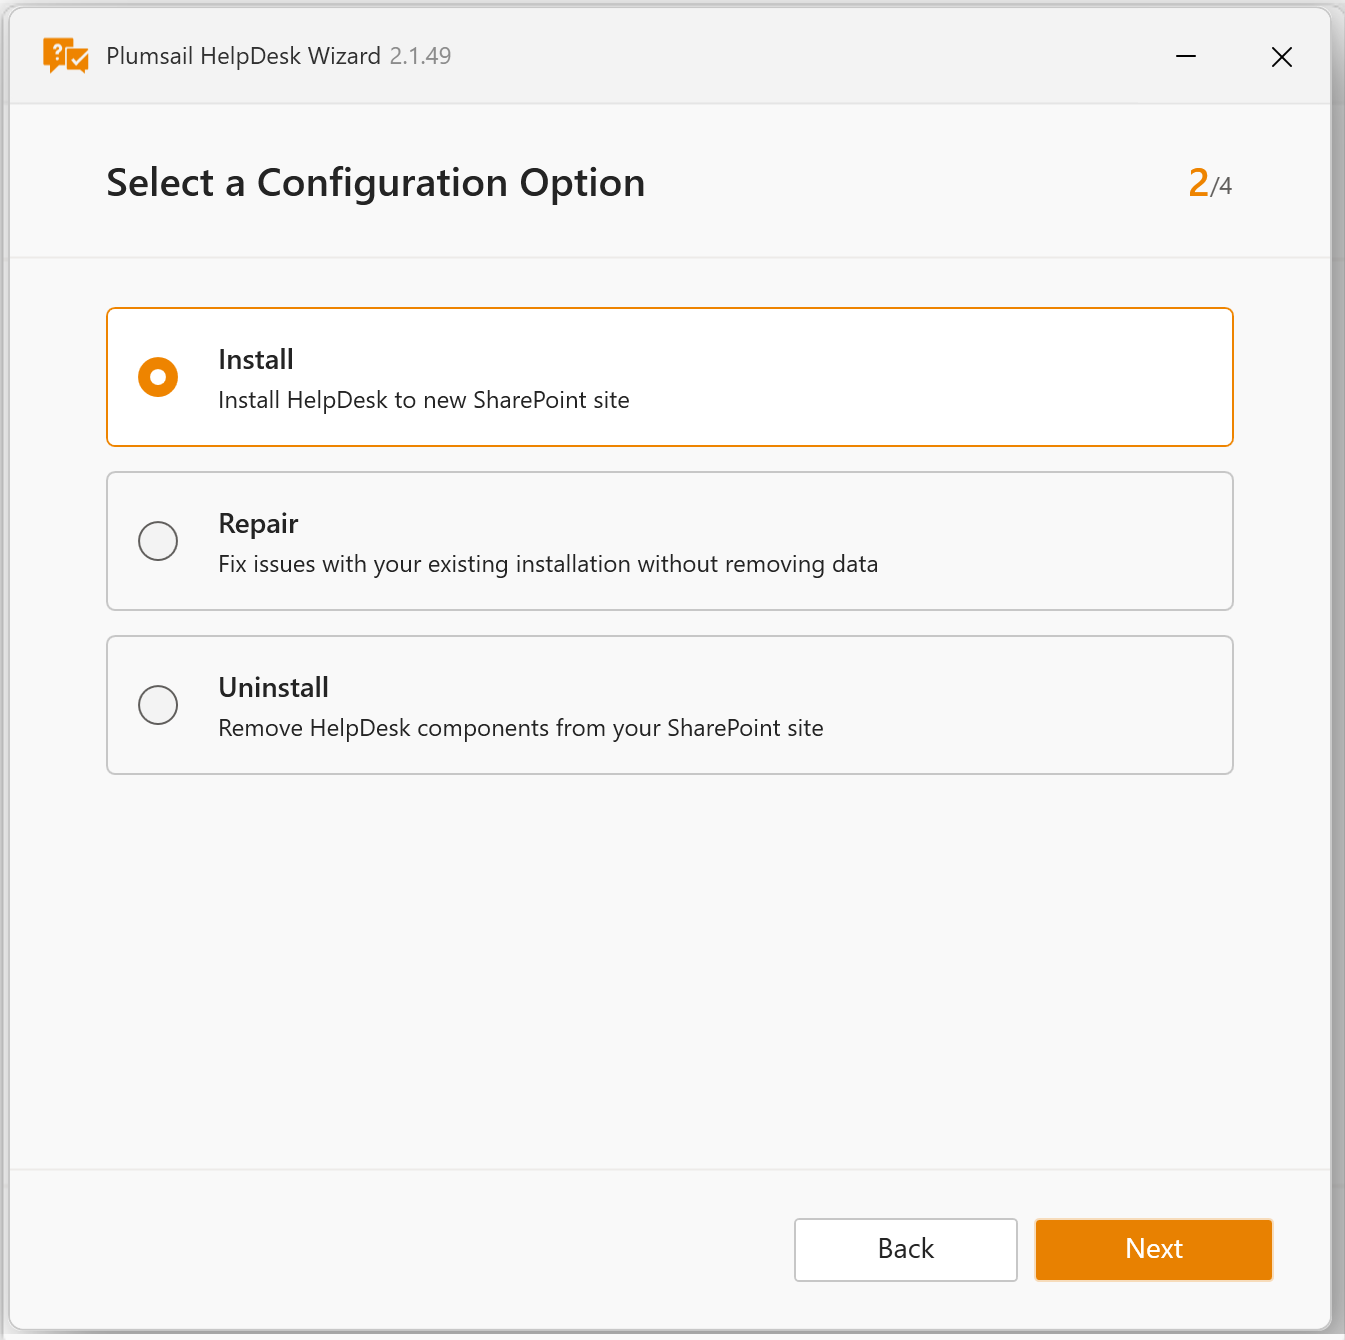
Install HelpDesk to new SharePoint site
Select the Install option to create a new SharePoint site and deploy HelpDesk there:
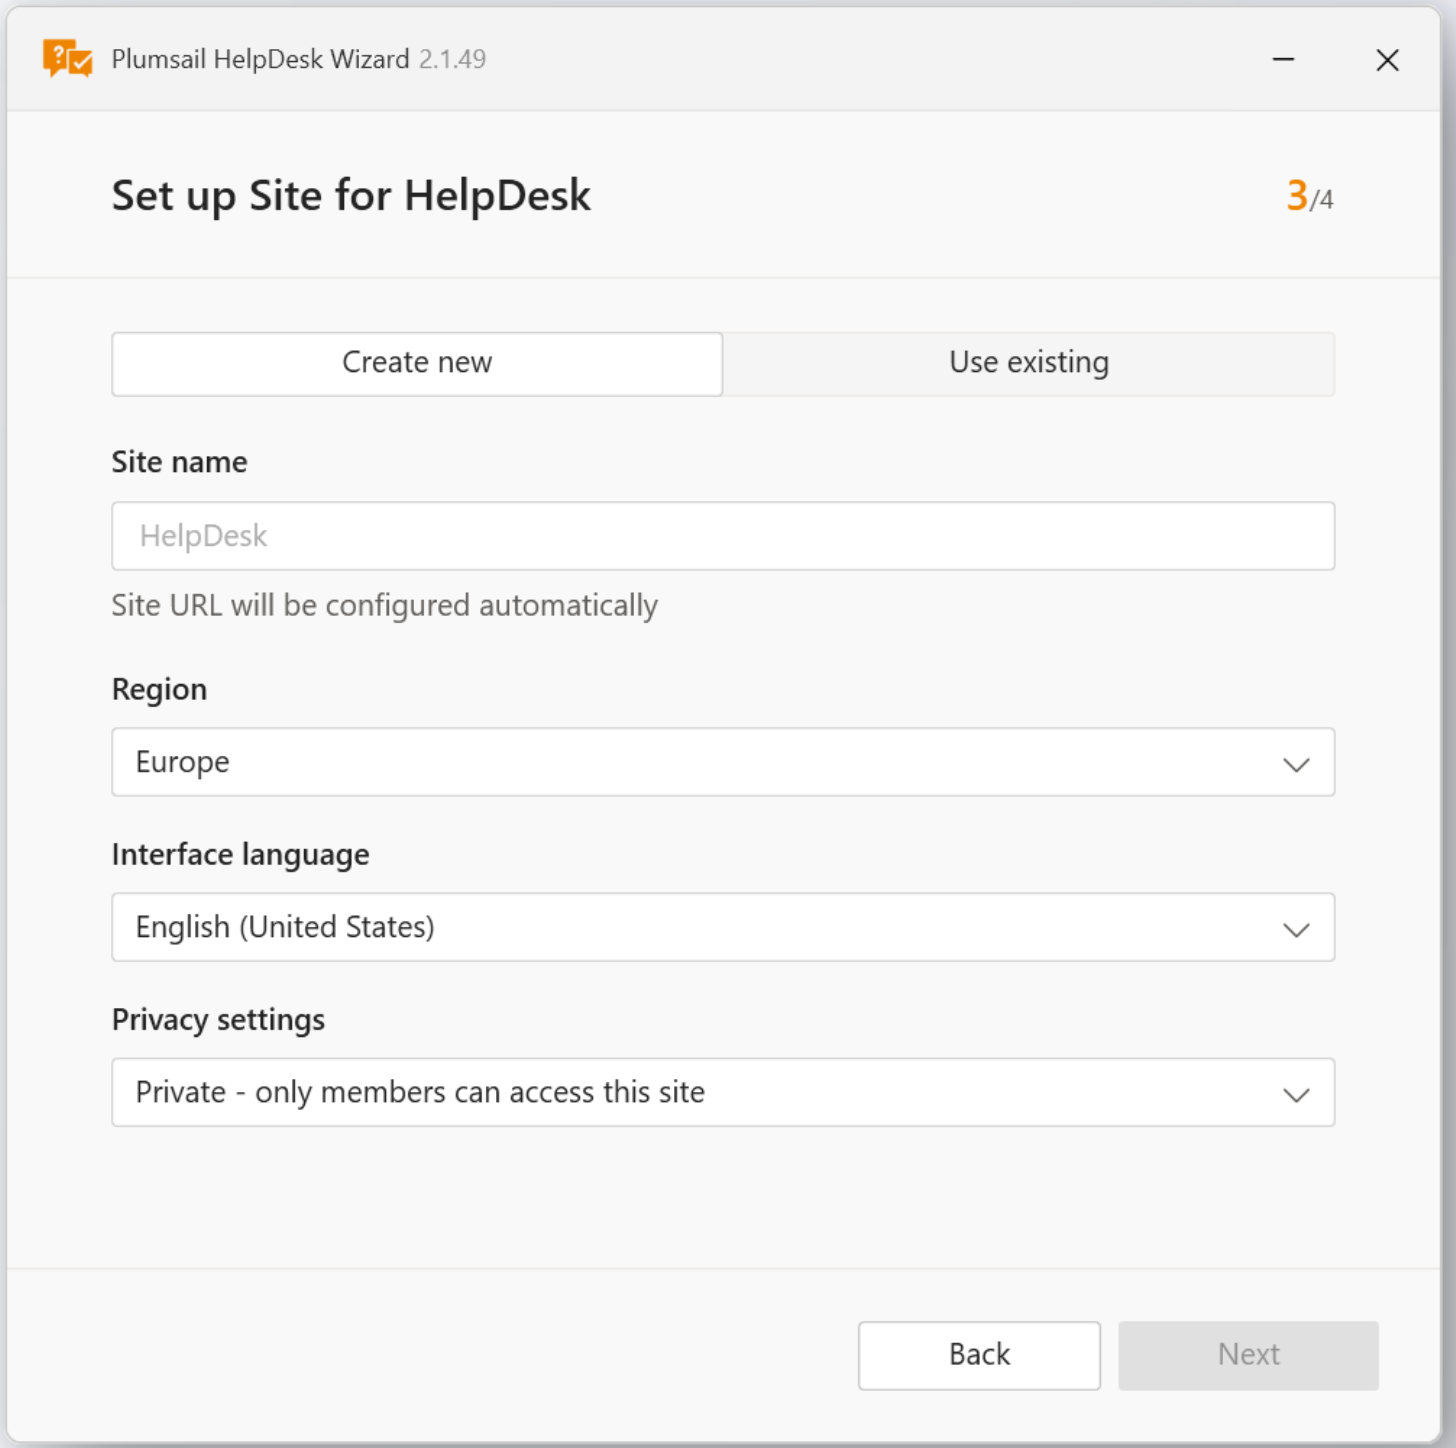
Enter a Site name, choose Region (Europe or United States), Interface language and Privacy settings:
Note
The first time you install HelpDesk on a SharePoint domain, you will be prompted to select a region. This choice determines the location of the servers that will process your data. For details, see our article on data center locations.
Click Next and once the setup is complete, your HelpDesk site will be available at:
yourdomain.sharepoint.com/sites/sitename
You can also open it directly from the installation wizard:
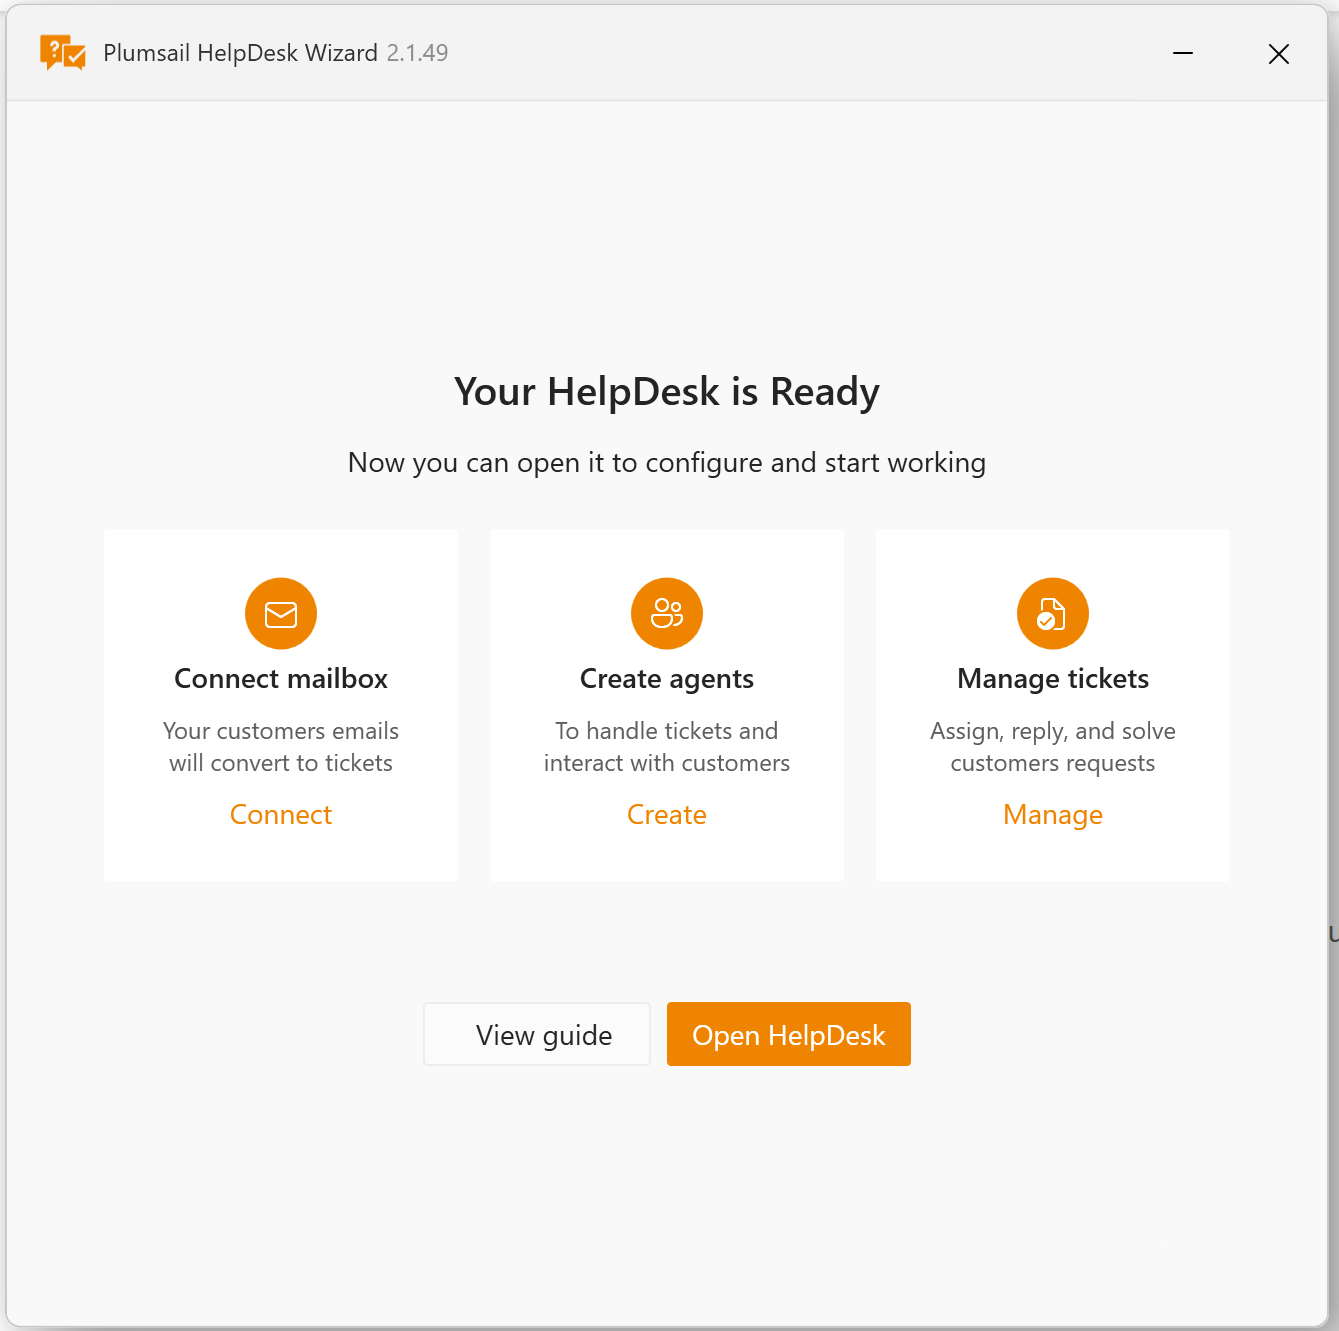
After HelpDesk is successfully installed, you can move on to the configuration steps.
Other installation options
The setup wizard also lets you:
Install to an Existing Site: Choose this option to add HelpDesk to one of your SharePoint sites.
Repair an Existing Installation: Use this if you need to fix an existing HelpDesk setup or to enable automatic client secret renewals.
Uninstall Existing Site: Remove HelpDesk components from the SharePoint site.
Known issues
Unfortunately, sometimes SharePoint Online experiences outages. Incidents that affect Microsoft 365 or SharePoint Online may prevent HelpDesk installation.
Please check the health status of Microsoft 365 services (“Health” feature of Microsoft 365 admin center). If there are problems that affect the specified services, wait until they are resolved and try to install HelpDesk again.